The DNA chipset set the usability standard for the vape industry. Devices without the popular interface make an attempt to mimic certain aspects of the software, but often fall short. Adjusting temperature on a DNA 200 chipset has never been easier, today we’ll walk you through the steps!
Evolv paved the way for chip sets in vape devices. Their micro-chips are user friendly, and offer an unprecedented level of customization via their E-scribe software. The DNA 200 was the first powerhouse interface to gain the respect of the industry, and was such a huge success that it forced other vape companies to kick their electronic interfaces into overdrive.
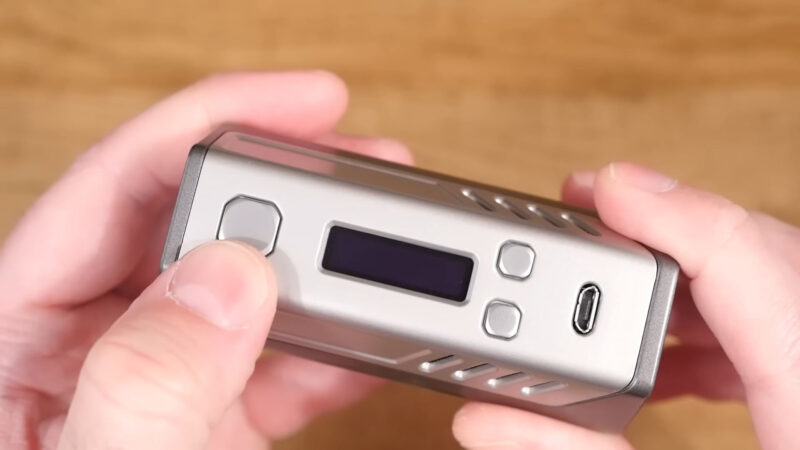
Changing certain features on the DNA 200 chipset is as easy as 1-2-3, and adjusting the temperature is no different. For today’s tutorial, we’ll be using the Lavabox DNA 200 from Volcano E-cigs. It’s an older device without a touch screen interface, so we’ll be making changes via button clicks.
Locking Your Device
Before you make changes to the temperature, you’ll need to lock the device. This mostly serves as a safety measure (temporarily disables the fire button…), but is also required to enter the temperature control menu.
Start by clicking the fire button five times. You’ll have to do it fairly quickly, otherwise the chip will not recognize your input. You should now see this display confirming that your device has been locked:
Entering The Temperature Menu
After your device has been locked, you’ll need to hold both negative and positive adjustment buttons simultaneously for about five seconds (maybe less). If you’ve done everything correctly, you’ll see this display:
Before this tutorial, I had my device set to 470 degrees. Once you’ve entered the temperature adjustment menu, you can use the minus button to turn the temperature down: And the positive button to turn the temperature up:
Exiting The Temperature Menu
To exit the temp adjustment menu, simply press the fire button once more. This will lock the temperature you have selected, ensuring it will not be changed while vaping.
Unlocking Your Device
Once you have changed the temperature, you’ll need to unlock the device to use it. To accomplish this, simply click the fire button quickly again five times. You’ll see another display confirming that your device has been unlocked. Now you’re ready to vape!
A Few Things To Keep In Mind
Button arrangement on some DNA 200 devices will be different, but they should all have the same minus/positive controls and fire button (obviously). So the steps required to change your temperature should be virtually the same.
Additionally, your temperature can also be adjusted using Evolv’s Escribe software. But changing the temp you’re vaping at on the fly can only be accomplished using the steps above. DNA devices recognize if the material used for your build is temperature compatible, so you don’t have to worry about firing a metal that cannot be temperature controlled.
Frequently Asked Questions
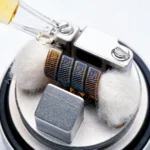
Can I use any type of coil with the DNA 200 chipset for temperature control?
No, you must use coils made from materials compatible with temperature control, such as nickel, titanium, or stainless steel.
What is the maximum temperature I can set on a DNA 200 device?
The maximum temperature varies by device, but typically DNA 200 chipsets can go up to 600°F (315°C).
How does the DNA 200 chipset ensure accurate temperature control?
The chipset uses a feature called Temperature Protection to monitor and adjust the temperature of the coil in real-time.
Can I use the Escribe software on any operating system?
Escribe is compatible with Windows. For Mac users, a Windows operating environment will need to be used.
Is it possible to upgrade the firmware on a DNA 200 device?
Yes, firmware upgrades can be performed using the Escribe software to ensure your device stays up to date with the latest features.
How can I restore my DNA 200 device to factory settings?
You can reset your device to factory settings using the Escribe software by selecting the ‘Restore Defaults’ option.
Wrapping Things Up
As we wrap up this guide on navigating the temperature settings of your DNA 200 chipset, it’s clear that the vaping experience has evolved significantly. The DNA 200, with its precision and customization, stands as a testament to how technology can enhance personal enjoyment and satisfaction in vaping.
It’s not just about the convenience of adjusting settings; it’s about the empowerment of vapers to fine-tune their experience to match their individual preferences.
The steps we’ve outlined today are not just instructions; they are your pathway to unlocking the full potential of your device. The DNA 200 chipset is a marvel of vaping technology, offering a level of control that was once unimaginable. Whether you’re a seasoned vaper or new to the scene, the ability to adjust your temperature settings with such ease and accuracy is a game-changer.