The parallel coil is a good starting point for anyone new to building their own coils. It requires very little effort, a few basic tools, and can typically be completed in under 15 minutes. The coils you make in this parallel coil build tutorial won’t last as long as a framed clapton, but can provide a decent amount of flavor and vapor. And best of all, you’ll sharpen your building skills to prepare you for more complex coils!
There’s no shortage of companies selling complex pre-made coils. But what does it take to build your own? Practice, and a lot of it. You’ll have to start simple, and work your way up to the more advance builds as you become comfortable with the basics.
Tools Required:
- Power Drill
- Pliers
- Coil Jig/Builders Rod
- Vape wire of choice
For this parallel build, I decided to go with straight 24g kanthal wire. Feel free to use whatever wire you like though; just keep in mind that the diameter of your builders rod, wire gauge, and number of wraps will determine the final ohm of your coil.
Let’s get started!
Straightening Wire / Cutting to Length
There’s a great tutorial on how to straighten wire: here. Unlike other single gauge wire builds, straightening your wire beforehand is vital to producing a good parallel. I suggest getting in the habit of straightening all the wire you use regardless!
Once you have freed the wire of any imperfections, you’ll need to cut everything to equal lengths. You’re going to need two equal pieces of wire for this parallel build.
Coil Wrapping
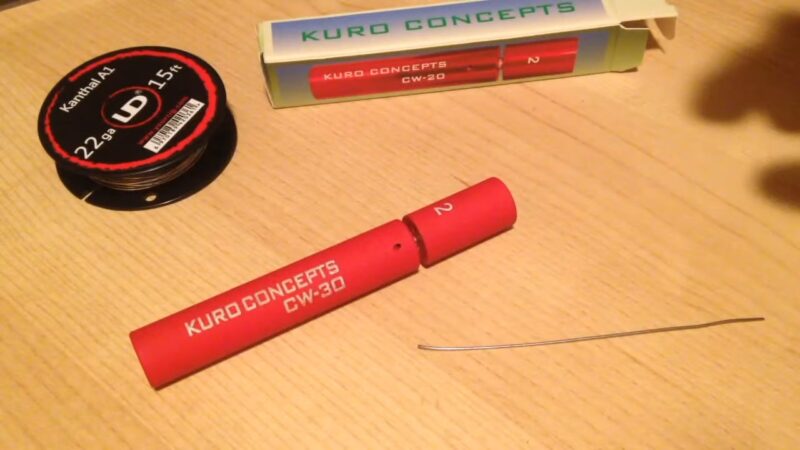
I decided to use a coil jig by Kuro Concepts for my parallel, but you can just as easily use a builder rod to wrap yours. Just take your time, making sure to keep everything uniform and evenly spaced.
Start by inserting the two equal wire pieces into the coil jig (if you’re using one), or pushing the wire up against the base of your rod. It should look like this:
After you have inserted both pieces of the wire through the opening in your coil jig, or secured both pieces of the wire down to one side of your builders rod. You can then continue on to the next step.
Now, making sure to hold your two pieces of wire together, proceed to make your first wrap around the metal rod. You should have something like this:
After you have completed the ‘pre-wrap’, and have both pieces of wire lined up evenly. You’ll need to make sure the two wires are not overlapping, but rather sitting right beside each other flat.
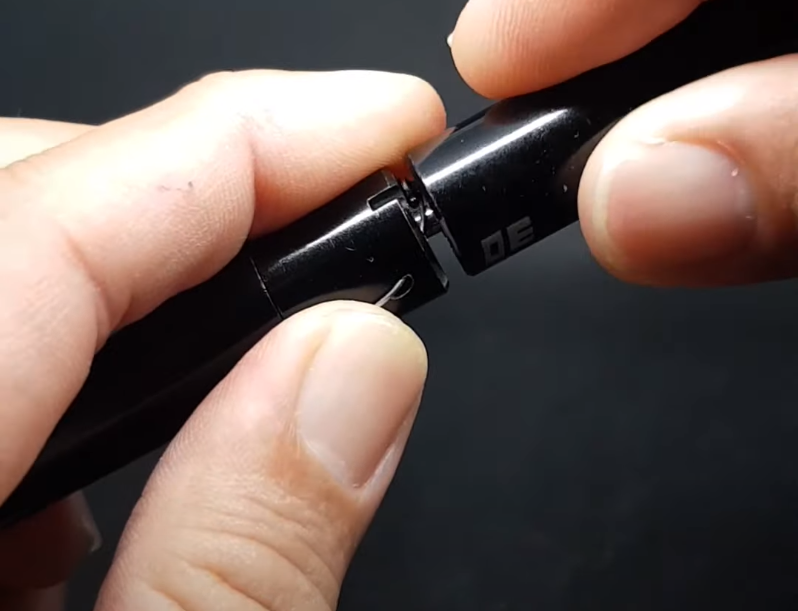
Now you can start to wrap your coil. Using the Kuro Concepts tool, place the end cap of the jig on the metal rod. Make sure on the two ‘numbs’ are behind the back side of wire, ensuring that when you twist the end of the tool, the wire will be pushed around the metal rod. Once everything is set up, you should have something that looks like this:
If you decided to use a builders rod instead of a jig, you’ll set everything up in the same manner. But instead of completing your coil’s wraps by turning the end of the Kuro tool, you’ll manually wrap the two wires around your rod.
Which ever method you choose, you’ll need to make sure that both wire continue to lay flatly on the rod, and do not overlap or twist, but rather run perfectly parallel throughout the entire length of the coil.
Choosing the number of wraps for your parallel will be a determining factor in the ohm of the coil. Feel free to use the many vaping calculators on the market, to get an idea of how many wraps you’ll need to achieve your desired wattage range.
Installation
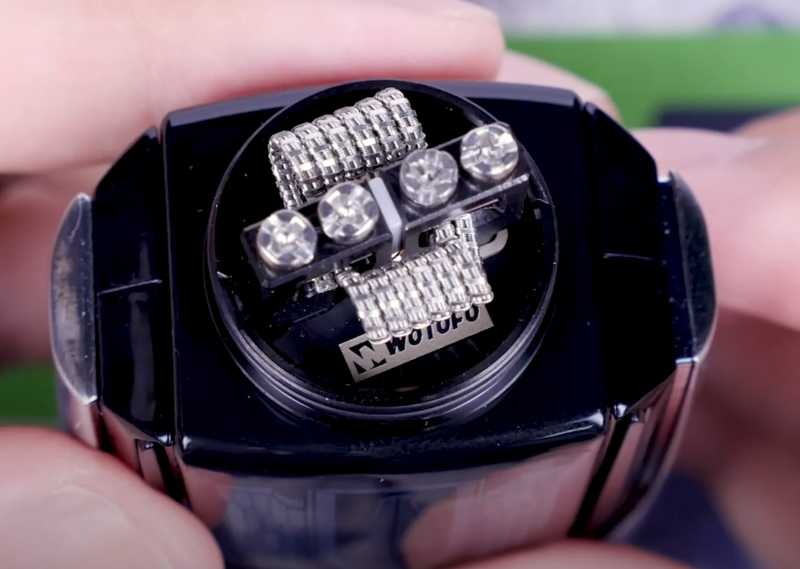
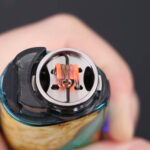
With your nicely wrapped parallel coil in hand, you can proceed to install it on whatever topper you choose. I’d suggest using an RDA personally, as the extra width of the coil probably wont fit on an RDTA.
I decided to use the Warrior RDA by Wotofo, it’s large 25mm deck make installing wide coils like the parallel a breeze!
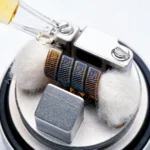
After you have the coil inserted, line it in the middle of the deck. Holding the coil with your finger, continue to tighten all post screws down. Tightening may twist or bend your coil to one side, but this can easily be fixed using the same rod you used to wrap your coil.
Adjust the parallel with the metal rod, and line everything up in the middle of the deck and even with the height of the post holes.
Now, tighten your post screws down one more time. Any adjustments made to the alignment of your build will typically loosen the screws, even if you’ve tightened them all the way. Your parallel should look nice and straight, and not be touching any part of the RDA deck (posts, base, etc).
Now all you have left to do is cut the excess! Trim the extra metal off your leads, cutting them close to the wall of the posts. Your cleaned and trimmed build should look like this:
Congratulations you’ve successfully wrapped your first parallel coil!
For a dual parallel build, simply repeat the wrapping and installation portions of this tutorial. Many of the skills required for this simple build will be used later for more complex coils, so this is a valuable skill for the rest of your building career!
Final Thoughts
In conclusion, mastering the parallel coil build is a fundamental skill for any vaping enthusiast who enjoys the process of creating their own coils. While it may not have the longevity of more intricate designs, the parallel coil offers a satisfying balance of flavor and vapor production, making it an excellent choice for daily vaping.
As you’ve seen, with a few basic tools and some patience, you can achieve a well-crafted coil that enhances your vaping experience. Remember, the key to a successful build is precision and practice. Each step, from straightening the wire to the final installation, is crucial in ensuring that your coil functions safely and effectively.